Android入门第七篇之ListView (二)
上篇是讲的是如何制作一个具有两行文本的 自定义控件 ,作为ListView的Item的使用方法。这篇接下来也是围绕ListView和Item,更加深入地介绍它们的用法。
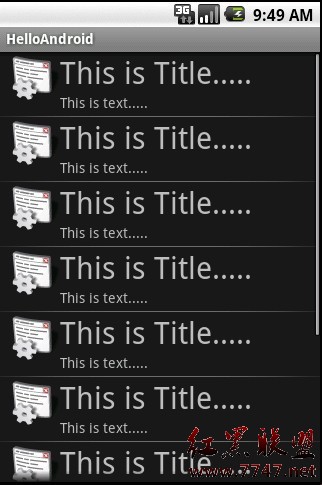
首先,先来看看本文代码运行的结果,本文的Item比上一篇中的Item多出左边的图标:
main.xml的源代码,跟上一篇的一样,这里就不作解释了,直接贴出my_imageitem.xml的代码,就是它实现ImageItem的UI:
view plaincopy to clipboardprint?
<?xml version="1.0" encoding="utf-8"?>
<RelativeLayout
android:id="@+id/RelativeLayout01"
android:layout_width="fill_parent"
xmlns:android="http://schemas.android.com/apk/res/android"
android:layout_height="wrap_content"
android:paddingBottom="4dip"
android:paddingLeft="12dip">
<ImageView
android:layout_width="wrap_content"
android:layout_height="wrap_content"
android:id="@+id/ItemImage">
</ImageView>
<TextView
android:text="TextView01"
android:layout_height="wrap_content"
android:textSize="30dip"
android:layout_width="fill_parent"
android:layout_toRightOf="@+id/ItemImage"
android:id="@+id/ItemTitle">
</TextView>
<TextView
android:text="TextView02"
android:layout_height="wrap_content"
android:layout_width="fill_parent"
android:layout_toRightOf="@+id/ItemImage"
android:layout_below="@+id/ItemTitle"
android:id="@+id/ItemText">
</TextView>
</RelativeLayout>
解释一下 my_imageitem.xml的代码:这里使用了RelativeLayout布局,控件的关键的属性是:
ItemTitle的属性 android:layout_toRightOf="@+id/ItemImage" ,ItemTitle在ItemImage的右边;
ItemText的属性 android:layout_toRightOf="@+id/ItemImage",ItemText在ItemImage的右边, android:layout_below="@+id/ItemTitle", ItemText 在 ItemTitle的下面。
最后,贴出JAVA的源代码,这里的源代码跟上一篇的很类似,只是修改了一部分,引入Item Image:
view plaincopy to clipboardprint?
@Override
public void onCreate(Bundle savedInstanceState) {
super.onCreate(savedInstanceState);
setContentView(R.layout.main);
&n
补充:移动开发 , Android ,