Maya Nurbs 汽车轮胎建模(1)
Maya Nurbs 汽车轮胎建模翻译说明: 为了让大家更能理解这个教程,我并不翻译其中一些命令,这样可以让一些初学者 ( 不是很熟悉 Maya Nurbs 建模命令 ) 更快找到这些命令。另:我的英文不好,所以在翻译的时候会有一些不足之处,如果有让你发笑的地方,请你给我提醒,我将更改过来 , 我的 Email: chinacache@163.com.
希望可以和大家一同进步!
Create Tire Pattern
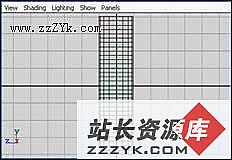
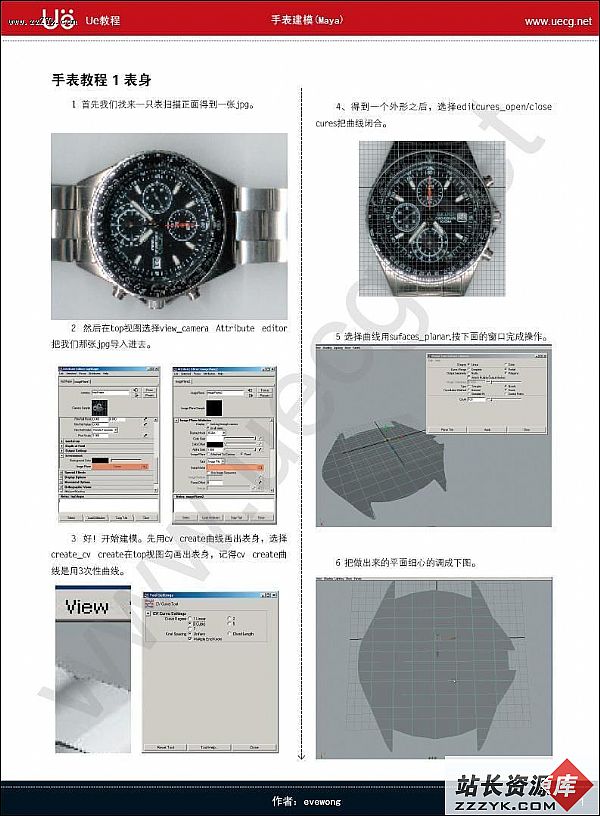
Open your Maya, from top view, create these curves (Fig 1), and move them to 6 of y-axis (go up). Remember...you must use closed curves. And of course... you could create another tire pattern. :)
打开 Maya, 切换到前视窗 , 创建如 (fig 1) 一样的曲线,并将它在 y 轴向上移动 6 个单位 . 记住 : 曲线必须是闭合的 . 另外,你也可以创建你自己喜欢的曲线样式 .
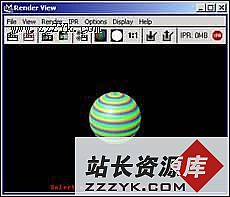
Then from front view, create a NURBS cylinder (radius 5, sections 12, spans 6), rotate it to 90°, name this cylinder master_ tire (Fig 2).
回到前视窗,创建一个 Nurbs 圆柱体 (radius 5,sections 12,spans 6), 旋转 90 度,将其命名为 master_tire (fig 2).
Fig 1
Fig 2
Tire Detail
From side view, select these outer CV's (Fig 3) and scale them smaller (Fig 4). Note : use center pivot axis to scale.
切换到侧视窗中,选择外沿的 CV 点 (fig 3) 将它们拉伸如 (fig 4). 注意 : 使用中心黄点来拉伸 .
Fig 3
Fig 4
Now duplicate this master_ tire and name the new one master_ copy , then hide master_ tire (select Master_tire then hit CTRL-H)
复制一条 master_tire 曲面 , 将其命名为 master_copy, 将 master_tire 隐藏起来 ( 选择 master_tire 曲面按 Ctrl+H 组合键 ).
Go to top view, rescale and adjust your curves to this position (Fig 5) (don't overlap the "master_copy" body), and then Shift-select master_copy and edit nurbs > project curve on surface .
Note : you must do this projection from top view.
Then from persp view you will have these new projection curves (Fig 6)
切换到顶视窗 , 将你的曲线重新拉伸缩放到如 (fig 5)( 不要超过 master_copy) ,然后按 Shift 键点选 master_copy ,选择 edit nurbs > project curve on surface 命令将曲线投影到曲面上 .
记住 : 你必须在顶视窗中投影 .
回到透视窗你将得到一些投影的曲线 (fig 6).
Fig 5

Fig 6
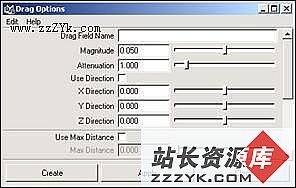
With the new projection curves still selected, go to menu surfaces > extrude > option box , select Distance and enter -0.15 on Extrude Length , output geometry to NURBS (Fig 7), then hit extrude, then from pers bottom view you will see this these extruded objects (Fig 8)
当新投影的曲线仍然被选择的时候,到 surfaces>extrude>option box , 将 Style 设为 Distance , Extrude Length 设为 -0.15. output geometry 设为 NURBS (fig 7), 设定好后点击 Extrude , 我们将得到如 (fig 8) 所示
[1] [2] 下一页
Fig 7
Fig 8
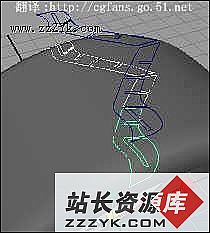
Now from persp view top, select "master_copy", go to edit NURBS and trim tool, you will see that white trim areas, select every top of the inner surface (see cyan and yellow points in Fig 9), and then press Enter, you will have these new NURBS objects (Fig 10)
回到透视窗,选择 "master_copy" 将使用 edit Nurbs>trim tool, 选择你要保留的区域 (fig 9) ,并 trim 它,我们可以是到新的 NURBS 曲面 .(fig 10)
Fig 9
Fig 10
上一页 [1] [2]

- 更多Maya疑问解答:
- Maya 4.0 NURBS建模-创建NURBS表面(4)
- Maya 硬件渲染粒子与软件渲染元素结合(1)
- 如何使用MEL Scripts
- Maya 4.0 创建场景物体-移动场景中的物体
- Maya 4.0 动画的基础知识-动画的基本概念
- Maya 硬件渲染粒子与软件渲染元素结合(3)
- Maya 4.0 界面介绍(1)
- Maya 4.0 骨骼动画-基本概念
- Maya 4.0 动画的基础知识-创建关键帧
- Maya 4.0 粒子系统-力场(2)
- Maya 4.0 渲染基础-渲染动画
- Maya 4.0 渲染基础-制作背景
- Maya 4.0 渲染基础-制作基本材质
- Maya 4.0 NURBS建模-创建NURBS表面(2)
- Maya 4.0 创建场景物体-准备工作(1)
部份技术文章来自网络,