Maya Nurbs 汽车方向盘建模(2)
Maya Nurbs 汽车方向盘建模翻译说明: 为了让大家更能理解这个教程,我并不翻译其中一些命令,这样可以让一些初学者 ( 不是很熟悉 Maya Nurbs 建模命令 ) 更快找到这些命令。另:我的英文不好,所以在翻译的时候会有一些不足之处,如果有让你发笑的地方,请你给我提醒,我将更改过来 , 我的 Email: chinacache@163.com.
Next, select your lofted object, Shift-Select the cylinder, go to edit nurbs > surface fillet > circular fillet > option box and apply these settings (fig 10). Note : Use 0.0010 for Positional Tolerance for better fillet tolerance, hit fillet, then you'll have this figure (fig 11).
接下来,选择你 Loft 成的曲面,按 shift 键选择圆柱体,到 edit nurbs > surface fillet > circular fillet > option box 选项框里运用这个设置 (fig 10).
记住 : 使用 0.0010 的数值给 Positional Tolerance ,这样你就可以得到 (fig 11).
fig 10
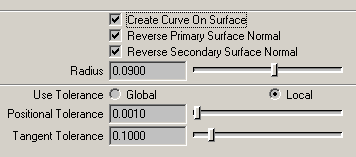
fig 11
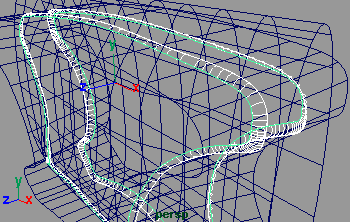
Next, select the cylinder, go to edit nurbs > trim tools , select one of the white trim areas (fig 12), rotate your camera view to back side, and select back center area (fig 13) then hit Enter.
接下来,选择圆柱体,到 edit nurbs > trim tools, 选择要保留的曲面区域,如 (fig 12)(fig 13) 所示,然后 Trim 它。
fig 12
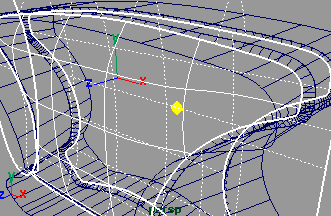
fig 13

Next, select the lofted object, go to edit nurbs > trim tools , select one of center top areas (fig 14) then hit Enter (fig 15).
选择 Loft 出来的曲面,到 edit nurbs > trim tools, 选择要保留的曲面区域,如 (fig 14)(fig 15) 所示,然后 Trim 它。
fig 14
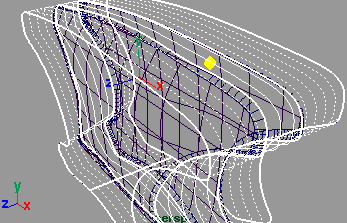
fig 15

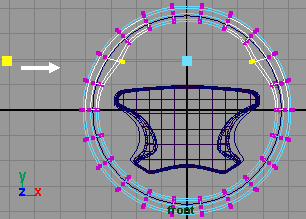
Next from front view, create a NURBS torus with radius 3.8, sections 22, height ratio 0.08, rotate it to 90° of X axis (fig 16), then select these 4 CVs and rescale them a little bit towards the center (use left manipulator to rescale them) (fig 17).
回到前视窗,创建一个 Nurbs 圆环,半径为 3.8,section 为 22 , hight ratio 为 0.08, 并在 x 轴方向上旋转 90 度 (fig 16), 选择这 4 个 CV 点并将它们向中心方向拉伸一点 .(fig 17)
fig 16

fig 17
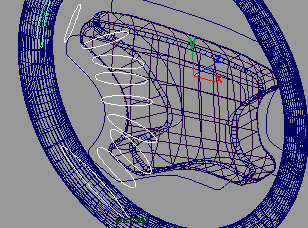
Next, create a NURBS circle with 18 spans, rotate it to around -41.676° of Z axis and rescale to 0.238 of Z scale, translate it to -2.484 of X axis and -2.736 of Y axis (fig 18). Next, you need to duplicate and rotate this curve several times towards the top left side and tweak some CVs (see fig 19).
接下平,创建一个 Nurbs 圆曲线, span 为 18, 并在 z 轴方向上旋转 -41.676 度,并将 z 轴方向缩小到 0.238, 在 x 轴方向上移动到 -2.484 , y 轴移动到 -2.736(fig 18). 接下来你需要复制一些曲线并旋转移动到 (fig 19) ,适当移动它们的一些 CV 点。
fig 18
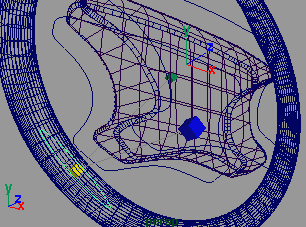
fig 19
[1] [2] 下一页
Next, select all of these curves sequentially and go to surface > loft (fig 20). Next create a NURBS cylinder with 16 sections, 4 spans, height ratio 2, rotate it to 90 of X axis, scale it 0.462 of X axis, rotate it to around 30.818° of Z axis, and then rescale one row of the outer CVs. Rescale them very small until it looks like they are touching each other (fig21).
按顺序选择这些曲线并 surface > loft (fig 20). 接下来创建一个 Nurbs 圆柱体, sections 16 , 4 spans, height ratio 2, 并在 x 轴方向上旋转 90 度 ,x 轴方向上缩小到 0.462, 在 y 轴方向上旋转 30.818 度,并拉伸一些 CV 点到看上去都接触到一起。
fig 20
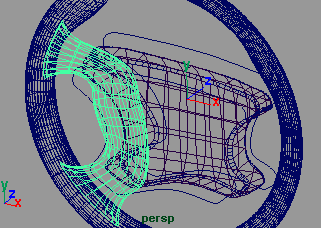
fig 21

上一页 [1] [2]
上一个:Maya 手表建模教程
下一个:Maya 手的建模(2)


- 更多Maya疑问解答:
- Maya 4.0 NURBS建模-创建NURBS表面(4)
- Maya 硬件渲染粒子与软件渲染元素结合(1)
- 如何使用MEL Scripts
- Maya 4.0 创建场景物体-移动场景中的物体
- Maya 4.0 动画的基础知识-动画的基本概念
- Maya 硬件渲染粒子与软件渲染元素结合(3)
- Maya 4.0 界面介绍(1)
- Maya 4.0 骨骼动画-基本概念
- Maya 4.0 动画的基础知识-创建关键帧
- Maya 4.0 粒子系统-力场(2)
- Maya 4.0 渲染基础-渲染动画
- Maya 4.0 渲染基础-制作背景
- Maya 4.0 渲染基础-制作基本材质
- Maya 4.0 NURBS建模-创建NURBS表面(2)
- Maya 4.0 创建场景物体-准备工作(1)
部份技术文章来自网络,